DIY Doll Slides & Castles (from the Recycling Bin)
A few weekends ago, F had a fever and my husband was out of town, so I spent the weekend homebound with the kids. In order to move the day along I asked the girls' to peruse Look What You Can Make With Dozens of Household Items!: Over 500 Pictured Crafts and Dozens of More Ideas! and find some projects, preferably with cardboard rolls as I've been hoarding these lately (so many project uses). Regarding our newest craft book, on one hand, I love the plethora of projects described (there are thousands, all of which require very few materials). However, the book includes photographs of the finished projects, which can be nervewracking with kids because they want their results to look as good as the books' results and, in my experience, unless MAJOR parental intervention occurs such perfection rarely results.
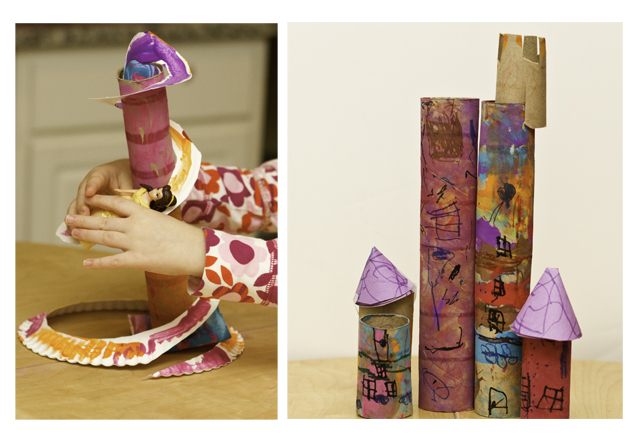
Luckily, P and F picked two relatively simple projects – a slide for dolls and a "castle".
THE SLIDE: The slide proved super easy to make. All we needed was an old paper towel roll, a paper plate, and some scrap cardboard to glue the paper towel roll onto. I cut the plate into a spiral and, voila, a doll slide. The girls loved their slides as is but I really wanted to stretch out the afternoon, so I asked F & P to paint them. Unfortunately, once the projects dried, F complained that the paint made the slide too "bumpy" for princesses. Oh well, she had a fever, which means, in her eyes, I couldn't really get anything right. 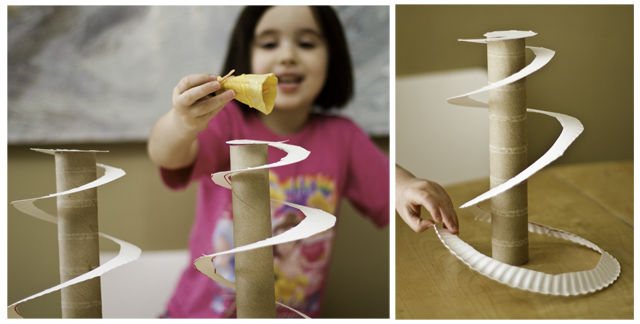
(The prepainting pics on the "smooth" slide)
THE CASTLE: Basically we just painted rolls of different sizes (T, my toddler, loved this part) and once they dried the girls drew in windows and doors for a castle-tower effect. We made roofs by tracing circles onto construction paper and then taping them together teepee style.
I actually think the castle came out pretty cute. Plus, all three kids actively participated, which made me happy (well, until clean up started). 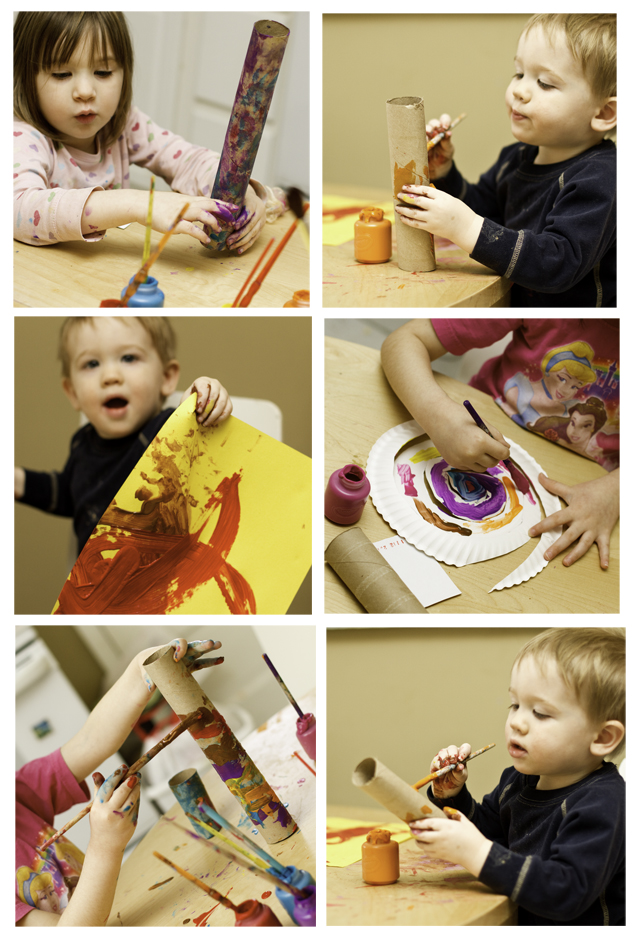
Post by Darcy : No Monsters in My Bed