Wall Stencil Tutorial
My daughter was born almost two and a half years ago, but until recently she and my son shared a bedroom because we loved the thought of them being together. I loved the challenge of creating a boy/girl nursery for them, but now that he's five and we're giving them their own spaces, I finally – after having a little girl for over two years – get to flex my pink design muscles!
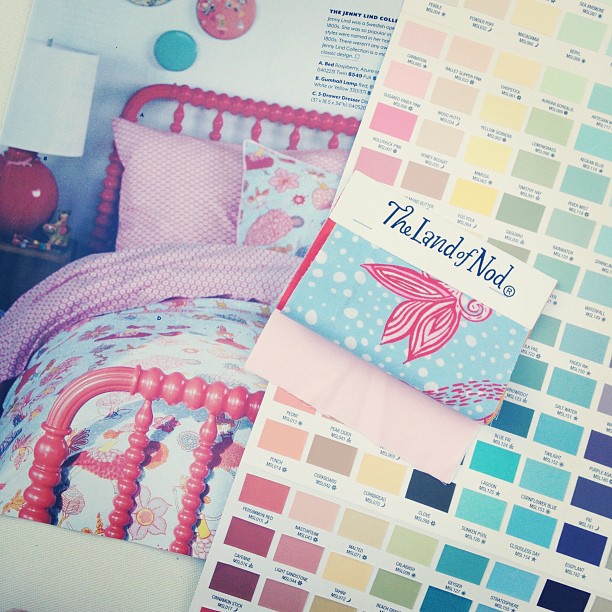
I expected to be overwhelmed by options for her new room and to have a terrible time finally settling on something I could commit to for a long time. But within a week of looking, I fell in love with some girly bedding in this month's catalogue from The Land of Nod. I ordered swatches (they're free!) to see if the fabric was really as dreamy in person (it was) and was inspired by the pale pink and orangey-red in the swatch pack. The color scheming began and before I knew it the room started taking shape in my mind!
I had a stencil in the closet of my studio that I won in a blog giveaway about a year ago and I'd been saving for a fun project.
You see how all of the stars are aligning here?
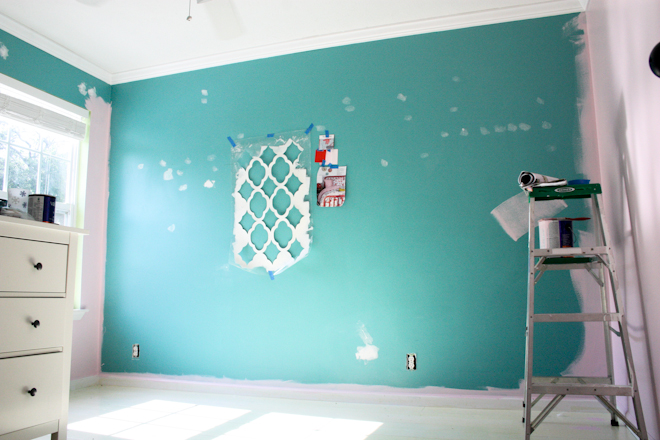
So: Pretty fabrics. Pretty paint colors. A big, bold, geometric stencil. And a week to make magic happen while my son spent the week at my in-law's.
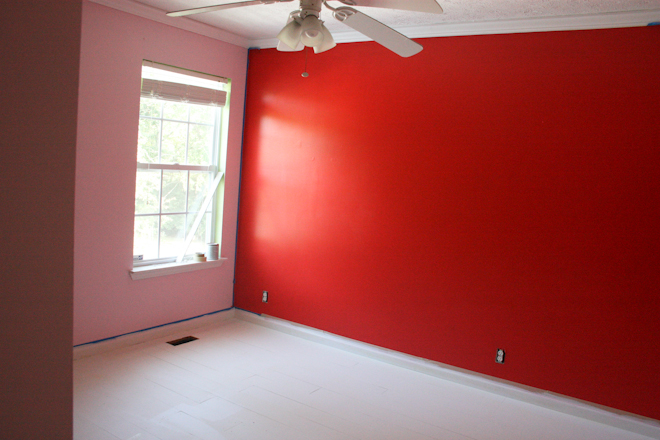
I knocked out the pale pink (Lauren's Lullaby A35-2, Olympic) fairly quickly, and the red (Fairmont Suite Clay Red 2009-4, Valspar) took about three coats to make right. But man, it was a really good-looking red!
Still, somehow it just wasn't coming together as I'd imagined. The red was so intense. Our nanny was here keeping our daughter so I could paint and she and I both wondered if maybe I'd crossed a color line with this one. That stencil was going to have to bring in some major pale pink to make this feel okay. I knew this was the plan all along – but I had no idea if I'd just signed myself up for something crazy.
Well, there was only one way to find out: Keep going!
Graphic Stencil Wall Tutorial
What You'll Need:
A great big stencil
Coordinating edge stencil
clip-on level
fresh coat of paint on your walls
1 qt paint for the stencil (that is, if you're just doing one wall)
small foam roller and tray
2" paintbrush or stipple brush
ladder
snacks
lots and lots of tape
a great Pandora station
Now, I'll be perfectly honest – most of this how-to is coming from personal experience as I really only skimmed the included instructions. You know, because I didn't want to waste time getting started.
I just began in one corner with the edge stencil as a space guide and worked my way across and down.
{I found that once I completed the top row, painting every-other section made things go more quickly because I could avoid waiting for paint to dry between steps.}
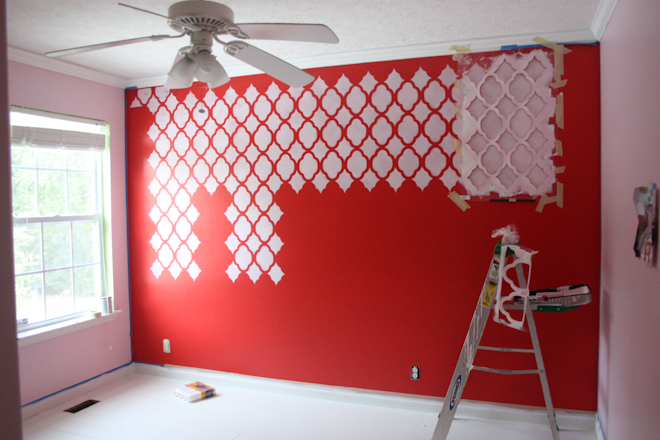
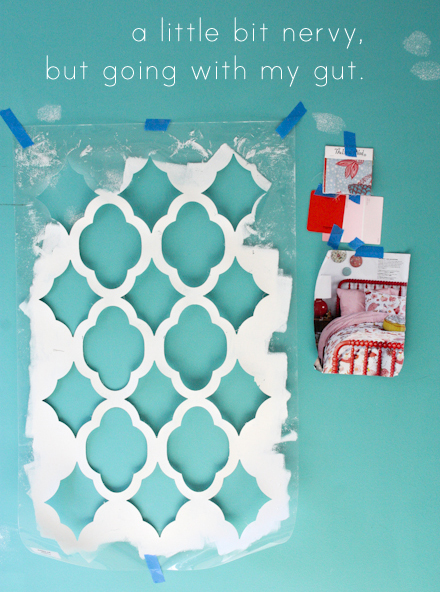
It really is as simple as getting your stencil positioned (I painted my first reference marks in the top left corner of the wall with my edge stencil), taped in place, and rolling the paint on (very light coats). I learned a few tricks as I went – like rolling the foam roller almost dry on the tray before taking it to the wall, and rolling one little opening at a time at an angle to prevent stroke lines – but if you practice on some cardboard or something before you dive into the real project, you can iron all of those techniques out for yourself.
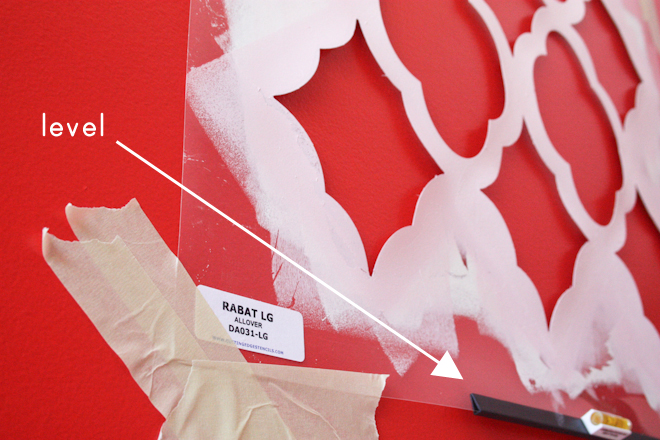
Oh, and do definitely invest in the clip on level. Not sure what would have become of my wall without it!
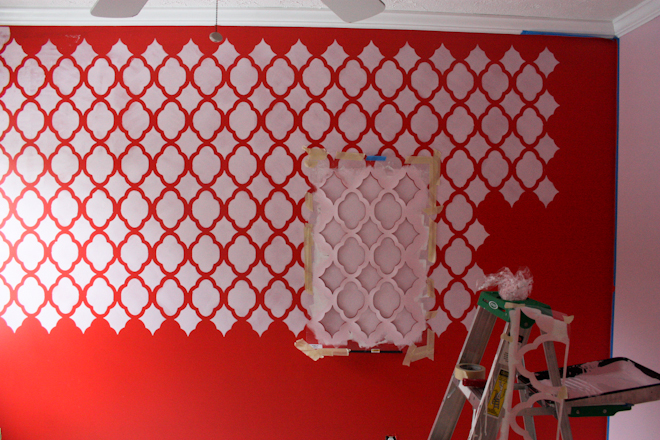
By the time I got the hang of it I was much happier and far less stressed. Still, this project was very time-consuming and stressful at the onset.
Fortunately, I love projects that are precise and definite (part of why I love sewing), and stenciling can have a lot of exactness to it. It's the times that things don't quite line up and you have to fake it that cause me to sweat a bit.
But what's a project without a little sweat and grey hairs, right?
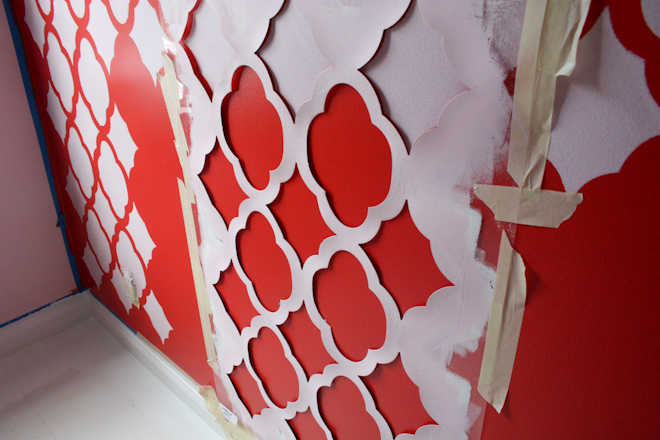
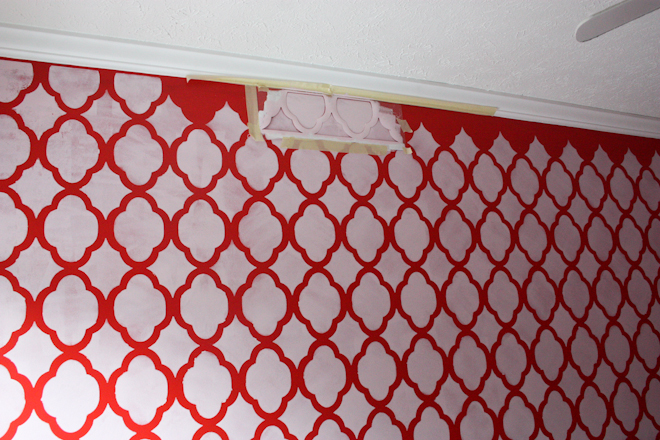
Once you've knocked out all of the big stencil stuff, just go along ceiling and baseboard with your edge stencil to make things look tidy and finished. (And do tape your trim to protect it. It will just make the whole process easier.)
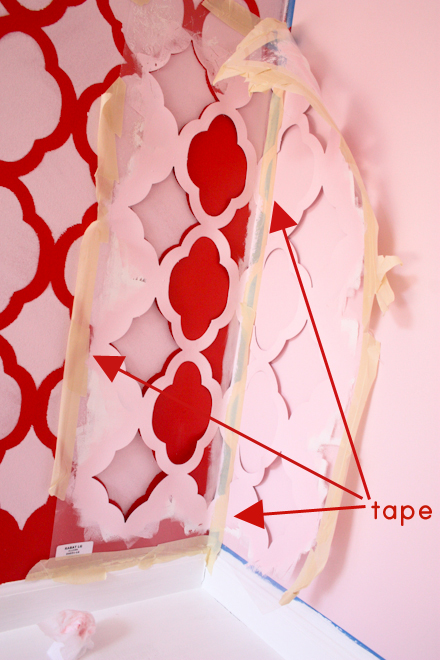
Corners: I think this was the trickiest part. And, I didn't really figure out the best technique until I was almost finished. The instructions suggested that I just gently curve the stencil into the corner and roll, but that's malarkey. I was getting paint everywhere it shouldn't be.
I never creased it, but I got the best results when I actually taped the stencil all the way down on the opposing wall as close to the corner as possible (I already had the corners precisely taped off from when I painted the red wall after the pink walls, this taping was strictly for holding the stencil in place). I was able to roll most of it, and then sort of stippled the tight corners with my 2" brush to fill in where my roller didn't reach.
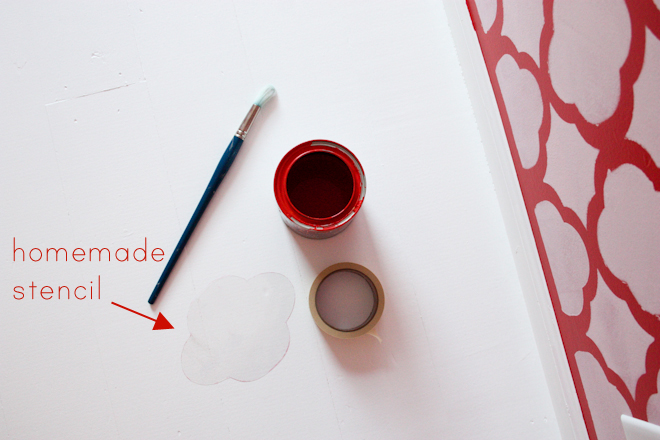
With all of the stenciling finished (main, top, bottom and sides), it was clear that I wasn't going to be totally at peace with my project as it was. Stencils bleed, paint sneaks out of the lines, accidents happen. I needed to tidy things up.
So, I found some rigid plastic (I used the packaging from our festive Target patio lights) and traced the shape from the inside of the main stencil with a pen. Then I cut it out to create an inverse stencil of each of the two shapes in my design.
Honestly, this was probably the most satisfying part of the whole project. I did it one afternoon and evening and I almost got obsessive about it. It was almost sad when I couldn't find any more places that needed to be touched up.
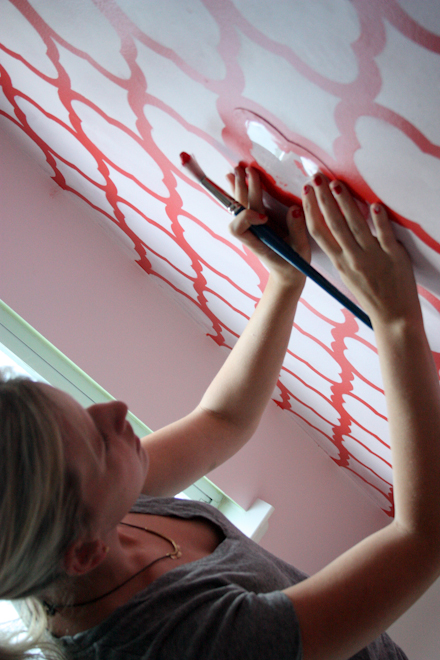
Just situate the stencil in place, and brush over any spillovers to create crisp, pretty lines. Mmmm… so, so tidy!
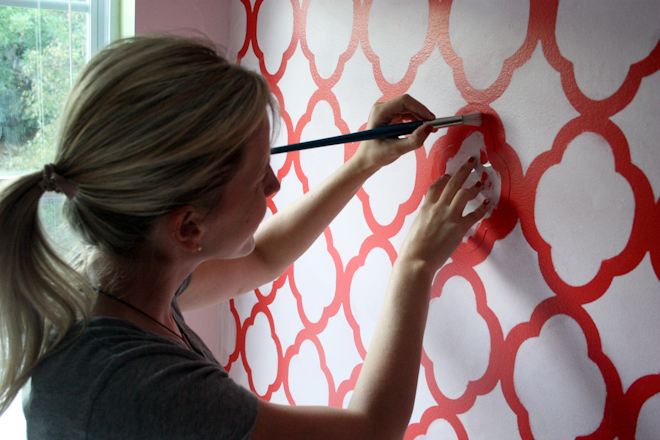
All told, the project took two full days. When Oliver got home from Michigan on Saturday he was delighted to see such a pretty room for his little sister, (big, fat, happy room reveal yet to come – it's worth it!) and I really couldn't be happier with the results.
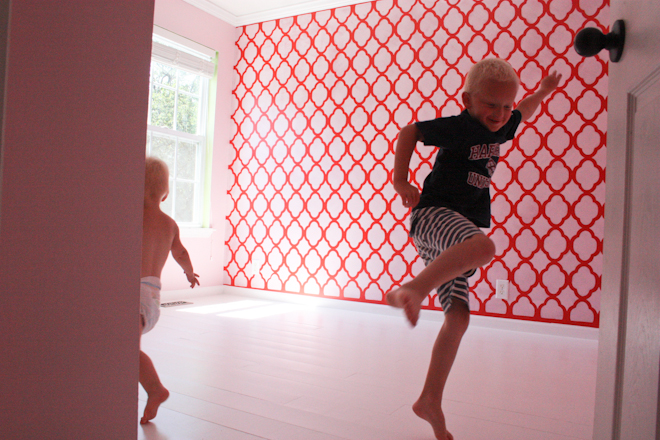
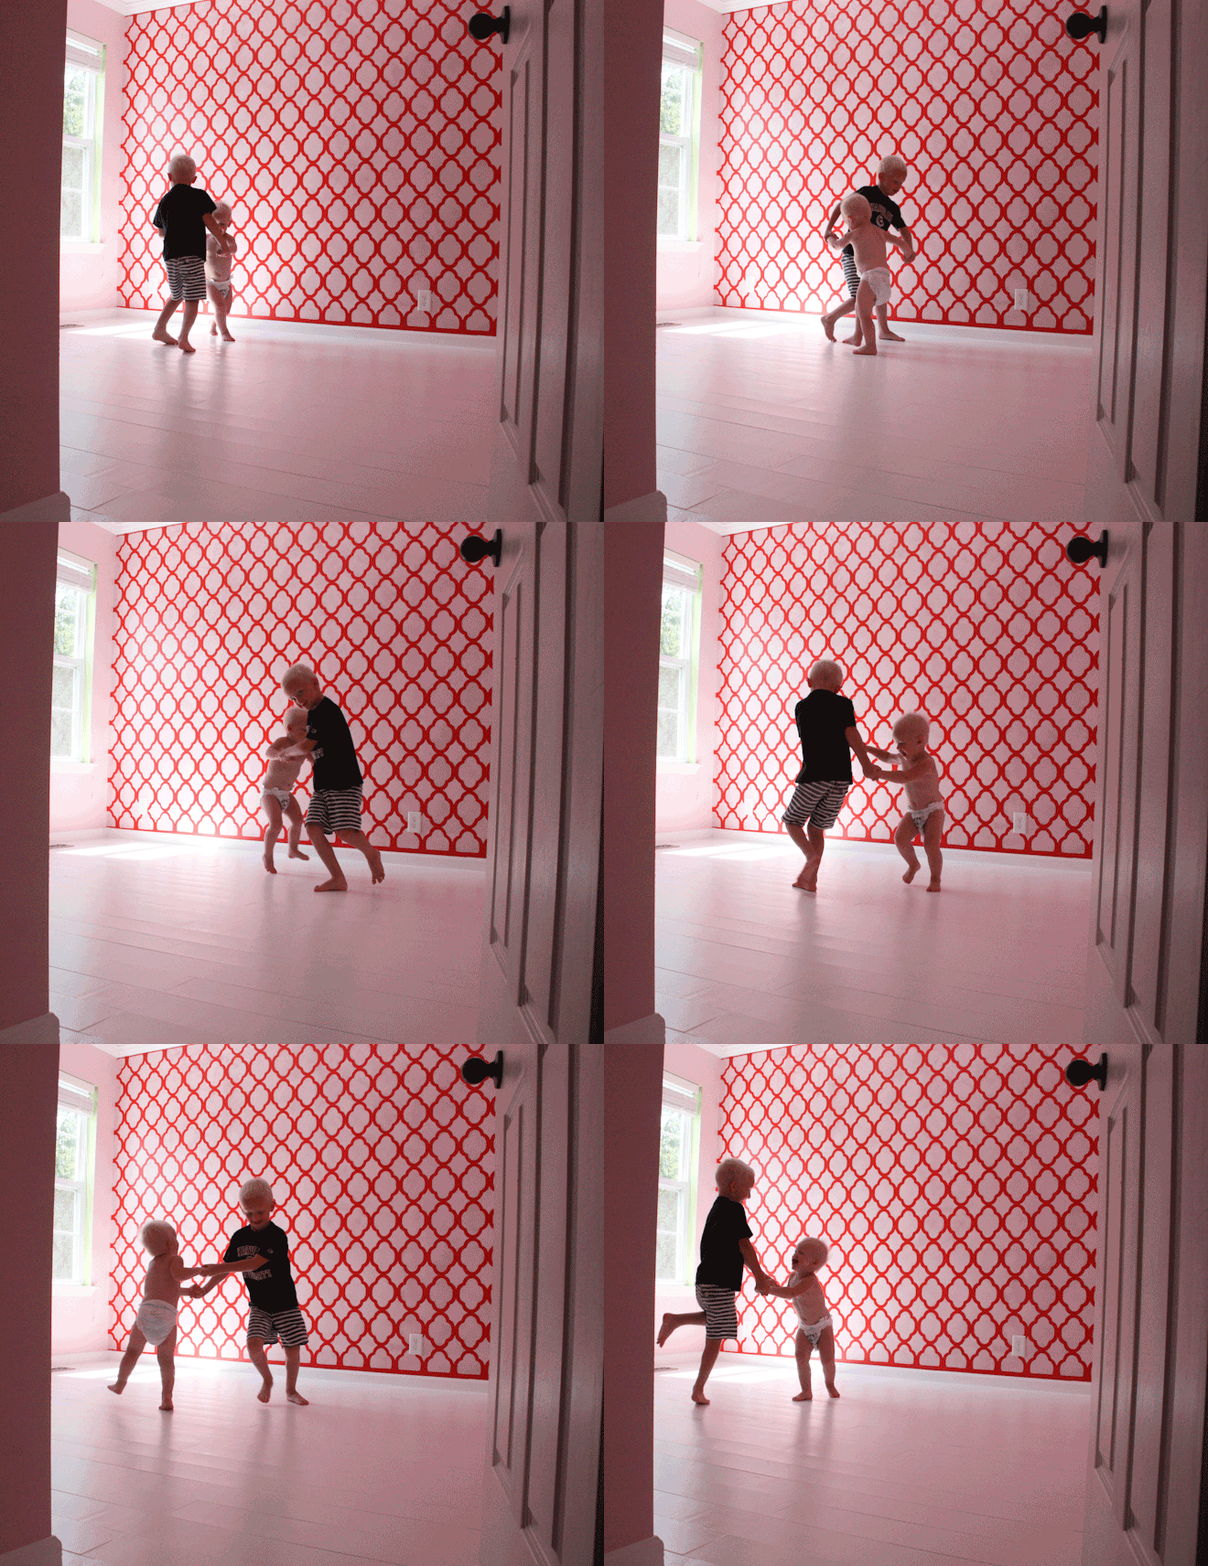
To close (and in the meantime as we wait for the entire room to be completed for the big, happy reveal), please enjoy a moment of my babies dancing together in the big, empty space (because that's what you do in a big, empty space when you're a kid!), and their Mama just feeling lucky enough to capture it with a continuous shot!
By Raechel Myers at Finding My Feet
Raechel is just a mama, trying to raise my children to love the Lord and take their dishes to the sink. She loves sewing, fun design projects, finding killer deals at garage sales, and drinking peppermint mochas all year long!
